
TECHNOLOGY
btd6_fix_repair_steam_v2_generic: Your Ultimate Guide
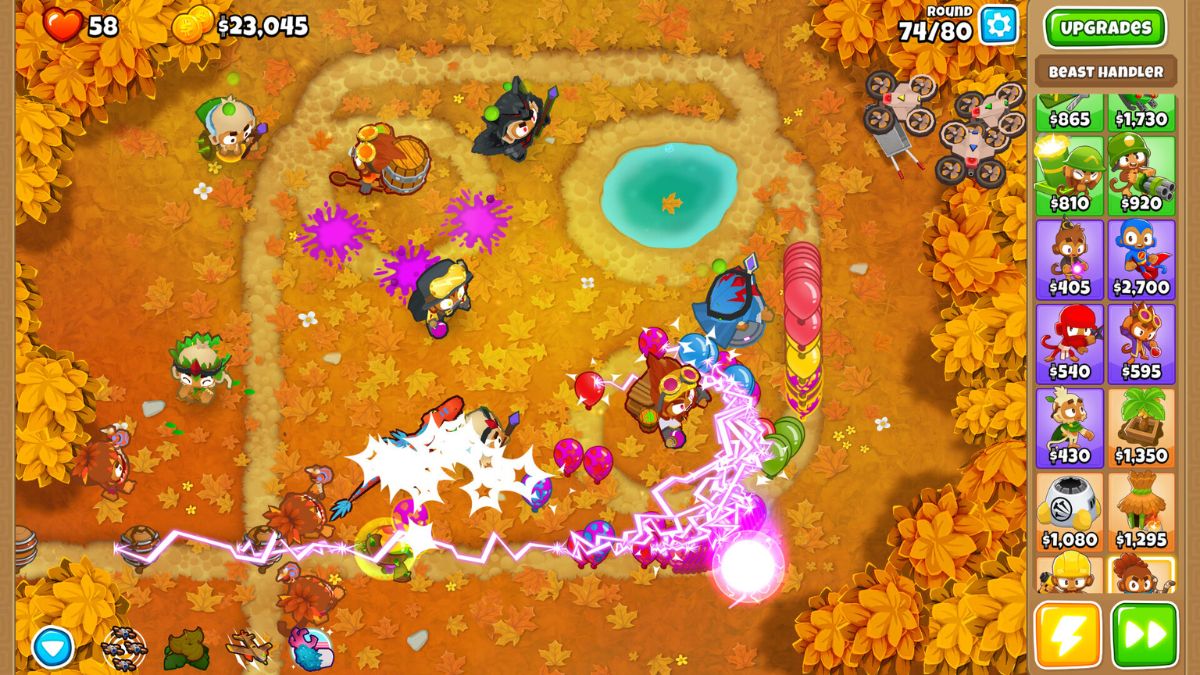
Welcome to the thrilling world of Bloons Tower Defense 6, where monkeys armed with darts, cannons, and wizardry defend against hordes of colorful balloons! Whether you’re a seasoned player or new to the game, encountering issues with BTD6 can put a damper on your popping adventures. Fear not! This ultimate guide is here to help you troubleshoot and optimize your gaming experience so you can get back to saving Monkey Town in no time. Let’s dive in and conquer those pesky problems together!
Common Issues and Errors in BTD6
Are you a fan of Bloons TD 6 but finding yourself frustrated by common issues and errors while playing the game? Don’t worry; you’re not alone. Many players encounter various challenges that can hinder their gaming experience.
One prevalent issue is the game crashing unexpectedly, disrupting your progress and causing frustration. Another common error involves graphical glitches or display problems that can affect gameplay visibility.
Players also report experiencing connectivity issues while trying to join multiplayer games or access online features. These interruptions can be particularly annoying when you’re eager to play with friends or compete against other users.
Additionally, some users have encountered performance issues such as lagging or slow response times during gameplay, impacting the overall enjoyment of BTD6. It’s essential to address these issues promptly to ensure a smooth and enjoyable gaming experience without any disruptions.
Understanding the btd6_fix_repair_steam_v2_generic
Understanding the inner workings of BTD6 can be a game-changer for your gameplay experience. From towers to upgrades, each element plays a crucial role in your strategy. By delving into the mechanics behind bloon types and tower interactions, you can fine-tune your tactics for optimal performance.
Knowing how to effectively manage your in-game resources like Monkey Money and Knowledge Points can give you an edge in progressing through the various levels and challenges. Understanding the importance of positioning your towers strategically on different maps is key to maximizing their effectiveness against incoming bloons.
Take time to explore the synergies between different towers and experiment with various upgrade paths to discover powerful combinations. Learning about advanced strategies such as camo detection and lead popping will help you overcome tougher obstacles as you advance in the game.
Step-by-Step Guide for Fixing BTD6 Issues
Are you facing issues with your BTD6 game on Steam and need a quick fix? Don’t worry, we’ve got you covered with a step-by-step guide to help you troubleshoot and resolve common problems.
Ensure that your device meets the minimum system requirements for running BTD6. Check for any pending updates on both the game and Steam platform to make sure you’re running the latest versions.
If the game is crashing or freezing, try verifying the integrity of game files through Steam. This process can identify and repair any corrupted files that might be causing issues.
Next, consider updating your graphics card drivers as outdated drivers can often lead to performance issues in games. Make sure to restart your computer after updating to apply changes effectively.
If multiplayer features are not working, check your internet connection stability and firewall settings. Sometimes network issues can prevent proper functionality in online modes.
By following these steps carefully, you should be able to tackle most common BTD6 problems efficiently without much hassle.
Tips and Tricks for Optimizing BTD6 Performance
Looking to take your Bloons TD 6 (BTD6) gaming experience to the next level? Optimizing performance is key! Here are some tips and tricks to help you get the most out of your gameplay.
First off, make sure your device meets the game’s system requirements. A smooth performance starts with compatibility. Keep your graphics drivers updated for seamless visuals and smoother gameplay.
Next, consider adjusting in-game settings. Lowering graphics quality can significantly improve frame rates on older devices. Experiment with different settings until you find the perfect balance between visuals and performance.
Don’t forget about background apps – they can hog resources and slow down your game. Close unnecessary programs before launching BTD6 for optimal performance.
Keep an eye on storage space. Clearing out old files and making room for BTD6 updates can prevent lagging issues down the line.
By following these tips, you’ll be well on your way to enjoying a seamless and optimized BTD6 experience!
Other Helpful Resources for Troubleshooting BTD6 Problems
Looking for additional resources to tackle those pesky BTD6 problems? Look no further! Reddit threads dedicated to Bloons TD 6 are a goldmine of tips, tricks, and solutions straight from the community. Engage with fellow players, share experiences, and benefit from collective troubleshooting knowledge.
YouTube tutorials can also be a game-changer when it comes to fixing specific issues in BTD6. Visual guides often make problem-solving more accessible and straightforward. From gameplay strategies to technical fixes, there’s bound to be a video out there addressing your concern.
Don’t underestimate the power of official forums and websites related to BTD6. Developers frequently post updates, patches, and bug fixes on these platforms. Staying informed about the latest developments can help you stay ahead of potential problems before they even arise.
Remember that sometimes a simple Google search can lead you to forum discussions or articles where other players have encountered similar challenges in BTD6. The internet is vast – use it wisely!
Conclusion Of btd6_fix_repair_steam_v2_generic
As you’ve learned in this guide, troubleshooting and optimizing your BTD6 game on Steam doesn’t have to be a daunting task. By following the step-by-step instructions and utilizing the tips provided, you can enhance your gaming experience and resolve any issues that may arise.
Remember, staying proactive with maintenance and updates is key to ensuring smooth gameplay. Don’t hesitate to explore additional resources or seek support if needed. With these strategies in place, you’ll be well-equipped to enjoy countless hours of bloon-popping fun in BTD6 on Steam.

Labarty is a term that has recently started appearing in online searches, creative discussions, and digital platforms where originality matters. In an era shaped by innovation, interactive challenges like the immaculate grid, and evolving digital language, labarty represents curiosity and adaptability. Rather than being tied to a rigid definition, is flexible, allowing users to shape its meaning based on context, purpose, and creativity. This article explores labarty in depth, examining its possible origins, modern applications, and why it continues to gain attention across different industries.
What Labarty Represents in Modern Usage
Labarty can be described as a conceptual term that thrives in environments where ideas are constantly evolving. Similar to how the immaculate grid encourages logical thinking and pattern recognition, functions as a mental placeholder for innovation and exploration. It is often used in creative projects, branding experiments, and digital naming strategies where uniqueness is essential.
Because does not carry historical limitations, it allows individuals and organizations to assign meaning freely. This makes it particularly valuable in a digital landscape that rewards originality and adaptability.
The Evolution of Labarty as a Digital Concept
The rise of labarty can be linked to how language evolves online. As new platforms emerge, people create and adopt fresh terms that feel modern and flexible. fits into this pattern perfectly. It began as a neutral term with no fixed identity and gradually gained relevance through repeated use and contextual interpretation.
Over time, has evolved into a recognizable label that sparks curiosity. This evolution mirrors how interactive concepts, including puzzle-based experiences like the immaculate grid, gain popularity through engagement rather than tradition.
Why Labarty Appeals to Creative Thinkers
Creative thinkers are drawn to labarty because it offers freedom. There is no predefined boundary for how the term should be used. Writers can turn into a story element, designers can make it a brand name, and educators can use it as a teaching concept for abstract thinking.
This freedom encourages experimentation. When people encounter , they are invited to think rather than assume, which leads to deeper engagement and interpretation.
Labarty in Branding and Digital Identity
In branding, labarty works as a strong identity element because it is both unique and adaptable. Digital brands often struggle to find names that are available, memorable, and flexible. satisfies all three requirements, making it a valuable option for startups and creative ventures.
The following table explains how supports brand development in different areas:
| Branding Area | Role of Labarty | Outcome |
|---|---|---|
| Brand Naming | Unique identity | Strong memorability |
| Digital Presence | Flexible meaning | Easy audience alignment |
| Long-Term Growth | Scalable concept | Future adaptability |
This table shows that can evolve alongside a brand without losing relevance.
The Psychological Impact of the Term Labarty
From a psychological perspective, labarty benefits from novelty and simplicity. Humans are naturally attracted to unfamiliar yet easy-to-process words. sounds balanced and approachable, which makes it easy to remember and discuss.
Just as the immaculate grid engages users by challenging their thinking, engages the mind by encouraging interpretation. This mental interaction increases interest and emotional connection, especially in digital environments.
Labarty in Educational and Learning Contexts
Labarty can also be used effectively in education. Teachers and trainers can introduce as an abstract concept, asking students to define it, apply it, or build frameworks around it. This approach enhances critical thinking and creativity.
The table below illustrates how fits into learning environments:
| Educational Use | Application of Labarty | Learning Benefit |
|---|---|---|
| Concept Building | Abstract definition | Critical thinking |
| Creative Writing | Open-ended theme | Imagination growth |
| Group Discussion | Shared interpretation | Communication skills |
By using as a teaching tool, educators can encourage deeper engagement without relying on rigid definitions.
Labarty and Its Role in Online Trends
Online trends often favor terms that are short, unique, and adaptable. fits perfectly into this category. It can be used as a hashtag, project name, or discussion topic without competing with established meanings.
As interactive content like the immaculate grid gains traction for its simplicity and engagement, terms like gain visibility because they align with the same principles of curiosity and user involvement.
Challenges of Using Labarty Effectively
Despite its strengths, labarty requires clarity when used in public communication. Because the term is open-ended, users must clearly explain what represents in their specific context. Without explanation, audiences may feel disconnected or confused.
Consistency is also important. Once a meaning is established for within a project or brand, it should remain consistent across platforms to build trust and recognition.
The Future Potential of Labarty
The future of labarty looks promising as digital spaces continue to evolve. As more creators and businesses seek unique identifiers, has the potential to become a widely recognized conceptual term. Its adaptability allows it to fit into future technologies, creative platforms, and educational models.
Much like interactive challenges such as the immaculate grid, thrives on engagement and interpretation. This makes it well-suited for a future driven by participation rather than passive consumption.
How Labarty Reflects Modern Communication
Modern communication values flexibility, creativity, and human connection. Labarty reflects all three qualities. It is not limited by strict definitions, which allows people to shape it according to their needs and experiences.
This reflects a broader shift in how language is used online. Words are no longer static; they evolve through use, community interaction, and creative application. is a clear example of this transformation.
Final Thoughts on Labarty
Labarty is more than just a word; it is a symbol of modern creativity and digital adaptability. Its open-ended nature allows it to be shaped by context, making it valuable in branding, education, and creative exploration. By understanding and using it thoughtfully, individuals and organizations can connect with audiences in a meaningful and engaging way.
As digital language continues to grow alongside interactive trends like the immaculate grid, stands out as a term that encourages curiosity, imagination, and innovation.

Mutstreams is a term that has steadily gained attention among online users searching for reliable digital content platforms and emerging streaming-related concepts. In a world where digital entertainment and real-time access dominate user behavior,
represents a growing interest in streamlined content delivery and accessibility. This article explores
in depth, covering its meaning, evolution, practical uses, and why it continues to attract curiosity in modern digital discussions.
What Is Mutstreams and Why It Matters
Mutstreams can be understood as a digital concept associated with streaming access, user-driven content consumption, and evolving online entertainment behaviors. While interpretations may vary depending on context,
generally reflects the idea of multiple content streams tailored to user interests. Its importance lies in how it aligns with modern consumption habits, where users prefer flexibility, speed, and personalization.
As digital ecosystems expand,
becomes relevant because it symbolizes the shift away from rigid content schedules toward on-demand and adaptive streaming experiences. Understanding
helps users and creators better navigate today’s content-focused internet.
The Origin and Development of Mutstreams
The emergence of mutstreams is closely linked to the rapid growth of online streaming culture. As platforms evolved to support live content, recorded media, and interactive features, new terminology surfaced to describe these experiences.
developed organically as users searched for ways to describe diversified streaming access under one conceptual label.
Over time,
evolved from a niche reference into a broader term associated with content discovery and accessibility. This evolution highlights how digital language adapts quickly to technological innovation and changing user expectations.
How Mutstreams Fits into the Digital Streaming Landscape
Mutstreams plays a role in shaping how people perceive and interact with digital streaming environments. Instead of relying on a single source or format,
reflects the idea of accessing content from multiple digital streams simultaneously or interchangeably.
The following table illustrates how
integrates into modern streaming behavior:
| Streaming Aspect | Role of Mutstreams | User Benefit |
|---|---|---|
| Content Access | Multi-source availability | Greater flexibility |
| User Experience | Streamlined navigation | Improved engagement |
| Personalization | Interest-based streams | Relevant content delivery |
This table shows that
aligns well with user expectations for convenience and customization.
Mutstreams and User Engagement Trends
User engagement is a critical factor in digital success, and mutstreams contributes to higher interaction by offering adaptable content experiences. When users can easily switch between different content streams, they remain engaged for longer periods.
supports this behavior by encouraging exploration without friction.
The appeal of
also lies in its ability to reduce content fatigue. By offering varied streams, users feel less overwhelmed and more in control of their viewing choices, which enhances satisfaction and retention.
Mutstreams in Entertainment and Gaming Communities
Entertainment and gaming communities are among the most active adopters of concepts like mutstreams. In these spaces, users often seek live gameplay, commentary, highlights, and community discussions simultaneously.
represents the convergence of these needs into a unified experience.
In gaming-related environments,
allows fans to follow multiple creators or events without missing important moments. This flexibility strengthens community bonds and encourages real-time participation.
The Role of Mutstreams in Content Accessibility
Accessibility is a major concern in digital media, and mutstreams contributes positively by offering multiple pathways to content. Users with different preferences, devices, or time constraints can benefit from the adaptable nature of
.
The table below highlights accessibility advantages associated with
:
| Accessibility Factor | Mutstreams Contribution | Outcome |
|---|---|---|
| Device Compatibility | Multi-platform support | Wider reach |
| Time Flexibility | On-demand streams | User convenience |
| Content Variety | Diverse stream options | Inclusive experience |
This demonstrates how
supports a more inclusive digital environment.
Mutstreams as a Branding and Platform Concept
From a branding perspective, mutstreams offers strong potential because it suggests versatility and innovation. Platforms or projects using
as a concept can position themselves as user-centric and future-ready. The term itself feels modern and adaptable, which appeals to digitally savvy audiences.
also works well in search optimization strategies due to its uniqueness. With fewer competing interpretations, it allows brands to shape their narrative clearly and consistently.
Challenges Associated with Mutstreams
Despite its advantages, mutstreams also presents challenges that must be addressed thoughtfully. One challenge is clarity, as users may interpret
differently without proper explanation. Platforms using this concept should clearly communicate how
enhances the user experience.
Another challenge involves technical infrastructure. Supporting multiple streams smoothly requires strong backend systems and reliable performance. Without these, the benefits of
may not be fully realized.
The Future Outlook of Mutstreams
The future of mutstreams appears promising as digital consumption continues to grow. With advancements in streaming technology, artificial intelligence, and personalization algorithms,
is likely to become even more relevant. Users increasingly expect seamless access to diverse content, and
aligns perfectly with this expectation.
As platforms compete to deliver better experiences,
may evolve into a standard approach rather than a niche concept. Its adaptability ensures it can grow alongside emerging technologies and user demands.
Mutstreams and the Shift Toward User-Controlled Content
One of the most significant impacts of mutstreams is its support for user-controlled content experiences. Instead of passively consuming what is offered, users can actively choose how and when they engage.
empowers this shift by prioritizing flexibility and choice.
This change reflects a broader trend in digital culture, where users value autonomy and personalization.
fits naturally into this movement, reinforcing its long-term relevance.
Final Thoughts on Mutstreams
Mutstreams represents more than just a digital term; it reflects a fundamental change in how people interact with online content. Its focus on flexibility, accessibility, and user engagement makes it an important concept in today’s streaming-driven world. By understanding , users and creators alike can better adapt to evolving digital expectations.
As technology advances and content options expand, stands out as a symbol of modern, human-centered digital experiences. Its continued growth will likely shape how streaming platforms and communities develop in the years ahead.

The first time I heard the word Hellooworl, it came from a founder who looked both excited and uneasy. He had just closed his laptop after another long day of video calls and Slack threads, and he said something that stuck with me. “We are more connected than ever,” he said, “but we rarely feel understood.” That tension between constant connection and genuine human engagement sits at the heart of Hellooworl. It is not a product in the narrow sense, nor just another digital trend. It reflects a deeper shift in how technology is beginning to re-center itself around people, context, and early trust.
In its simplest form, Hellooworl represents a philosophy of building technology that starts with human connection rather than scaling metrics. For entrepreneurs and tech leaders, this idea is gaining traction because it speaks to a growing fatigue with hollow engagement. Users sign up quickly, click often, and leave just as fast. What they rarely do is form a lasting bond with a platform or a brand. Hellooworl challenges that pattern by asking a different first question: how do we create meaningful connections early, before growth becomes the main obsession?
Understanding Hellooworl in a Crowded Digital Landscape
The digital economy is full of tools designed to optimize speed, reach, and efficiency. Most startups are taught to chase rapid user acquisition and worry about depth later. Hellooworl turns that logic around. It argues that early-stage connection, when a user first encounters a product or service, shapes everything that follows. Trust, loyalty, and advocacy do not magically appear at scale. They are built through early experiences that feel personal and intentional.
What makes Hellooworl stand out is its resistance to over-automation. While it embraces modern technology, it avoids reducing people to data points too quickly. Founders experimenting with Hellooworl-inspired approaches often slow down onboarding, invite conversation, and design systems that listen before they push. This may sound counterintuitive in a world obsessed with growth curves, but the results can be surprisingly durable.
Why Early Connections Matter More Than Ever
In an age of artificial intelligence and algorithmic feeds, early impressions are amplified. A user decides within minutes whether a platform feels trustworthy or disposable. Hellooworl places weight on those minutes. It treats the first interaction not as a funnel entry, but as the start of a relationship.
From a business perspective, this has real consequences. Companies that prioritize early connection often see lower churn and more organic growth. Word of mouth becomes credible when users feel seen. Investors are also paying attention. They increasingly ask not just how fast a product grows, but why users stay.
Culturally, this shift reflects broader changes in how people work and live. Remote teams, global customers, and digital-first relationships all demand clearer signals of intent. Hellooworl responds by encouraging transparency and empathy early in the journey.
Hellooworl as a Framework for Founders
For founders, Hellooworl is less about branding and more about decision-making. It influences how teams design onboarding, customer support, and even internal communication. The idea is to create alignment early, before habits harden and complexity grows.
This framework often leads to smaller but more engaged communities in the beginning. Instead of chasing every possible user, founders focus on those who resonate deeply with the mission. Over time, this clarity becomes a competitive advantage.
The table below highlights how a Hellooworl-driven approach contrasts with more conventional early-stage strategies.
| Aspect | Traditional Early Growth | Hellooworl Approach |
|---|---|---|
| Onboarding | Fast, automated, generic | Slower, contextual, human |
| User Focus | Quantity of sign-ups | Quality of connection |
| Metrics | Clicks, installs, reach | Retention, trust, feedback |
| Communication | Broadcast messaging | Two-way dialogue |
| Long-Term Impact | Rapid churn risk | Sustainable loyalty |
This comparison shows that Hellooworl is not anti-growth. It is pro-foundation. It recognizes that strong roots support taller structures.
Technology That Listens Before It Scales
One of the most interesting aspects of Hellooworl is how it reframes the role of technology itself. Instead of leading with features, it leads with listening. Early user feedback is not treated as a dataset to be mined later, but as a conversation happening in real time.
Some startups apply this by embedding founders directly into early support channels. Others design interfaces that invite reflection rather than endless scrolling. These choices may seem small, but they send a powerful signal. They tell users that their presence matters beyond their ability to generate revenue.
From a technical standpoint, this does not mean abandoning automation or analytics. It means sequencing them differently. Hellooworl suggests that understanding comes before optimization. When systems are built on that understanding, automation becomes more humane and more effective.
The Business Case for Hellooworl
Skeptics often ask whether Hellooworl can survive in competitive markets. The answer lies in how value is measured. Short-term spikes are easy to engineer. Long-term trust is not. Businesses that invest in early connection often discover that their customers become collaborators rather than passive consumers.
This dynamic can influence product direction in meaningful ways. Features are shaped by real needs, not assumptions. Marketing becomes storytelling rather than persuasion. Even pricing strategies can reflect mutual respect, offering clarity instead of confusion.
For entrepreneurs navigating uncertain markets, Hellooworl provides a stabilizing lens. It reminds them that technology ultimately serves people, not the other way around.
Hellooworl and the Future of Work
The relevance of Hellooworl extends beyond customer-facing products. It also speaks to how teams are built and led. Early connections within a company often determine its culture. When trust and openness are established from the start, collaboration feels natural rather than forced.
In distributed teams, this is especially important. Without shared physical space, early interactions carry extra weight. Leaders who apply Hellooworl principles tend to invest more time in listening and context-setting. The payoff is resilience during periods of rapid change.
As work becomes more fluid and less tied to location, these human-centered approaches may define which organizations thrive.
A Broader Cultural Shift
Hellooworl also reflects a broader cultural moment. People are questioning systems that prioritize efficiency over meaning. They want technology that respects attention and acknowledges complexity. This does not mean rejecting innovation. It means shaping it with care.
Media, education, and even public institutions are beginning to echo similar themes. The emphasis on early connection suggests a desire to rebuild trust that has been eroded by scale-first thinking.
In this sense, Hellooworl is both a response and an invitation. It responds to digital fatigue, and it invites builders to imagine a different starting point.
Conclusion
Hellooworl is not a silver bullet, and it does not promise effortless success. What it offers is a shift in perspective. By focusing on real connections early, it encourages founders and technologists to slow down just enough to understand who they are building for and why. In a world racing toward automation and abstraction, that pause can be a strategic advantage. The future of technology may not belong to those who move the fastest, but to those who connect the deepest, starting from the very first hello.
-

 TECHNOLOGY2 years ago
Elevating Game Day Eats: A Guide to Crafting Crowd-Pleasing Sliders
-

 ENTERTAINMENT2 years ago
wave_of_happy_: Your Ultimate Guide
-

 FASHION2 years ago
GPMsign Fashion: Redefining Style with Purpose
-

 TECHNOLOGY2 years ago
Trader Joe’s Dayforce: Revolutionizing Workforce Management
-

 FOOD2 years ago
Altador Cup Food Court Background: A Culinary Extravaganza Unveiled
-

 HOME IMPROVEMENT1 year ago
What Kitchen Renovation Companies Offer Beyond Basic Remodeling
-

 SPORTS2 years ago
Score Chaser Sporting Clays: A Thrilling Pursuit of Precision
-

 NEWS2 years ago
Nyl2 Kemono: Unveiling the World