
HOME IMPROVEMENT
The Best Home Inspection Training Institutes: Kickstart Your Career
Hey there, future home inspector! So you’re thinking about diving into the world of home inspections, huh? Well, you’ve come to the right place. Today, we’re going to chat about how to kickstart your career by finding the best Home Inspection Training Institute for you. Buckle up, because we’re about to take a deep dive into everything you need to know to get started on this exciting career path.
Why Choose a Career in Home Inspection?
Before we jump into the nitty-gritty of training institutes, let’s talk about why you might want to consider a career in home inspection in the first place.
Job Security and Growth Potential
The housing market is always active, whether it’s booming or in a slump. People are always buying and selling homes, and that means there’s a constant need for qualified home inspectors. According to the Bureau of Labor Statistics, the job outlook for home inspectors is projected to grow faster than average over the next decade.
Flexible Work Schedule
One of the perks of being a home inspector is the ability to set your own schedule. Many inspectors work independently, allowing them to balance their work and personal life in a way that suits them best.
Helping People Make Informed Decisions
As a home inspector, you’ll play a crucial role in one of the biggest decisions people make in their lives. Your expertise will help buyers understand the condition of a property before they commit to purchasing it. It’s a job that comes with a lot of responsibility, but also a great deal of satisfaction.
What to Look for in a Home Inspection Training Institute
Okay, now that we’ve covered why this career path might be appealing, let’s talk about what you should look for when choosing a training institute.
Accreditation and Recognition
The first thing you’ll want to check is whether the Home Inspection Training Institute is accredited by recognized organizations in the field. Some key accrediting bodies include:
- The American Society of Home Inspectors (ASHI)
- The International Association of Certified Home Inspectors (InterNACHI)
- The National Association of Home Inspectors (NAHI)
Accreditation ensures that the institute meets certain standards of quality and that their curriculum covers all the necessary topics.
Comprehensive Curriculum
A good training program should cover a wide range of topics, including:
- Building systems (electrical, plumbing, HVAC, etc.)
- Structural components
- Exterior elements
- Roof systems
- Interior components
- Insulation and ventilation
- Fireplace and chimney systems
- Report writing
- Professional practices and ethics
Make sure the institute you choose offers a well-rounded education that touches on all these areas.
Hands-On Training
While theoretical knowledge is important, nothing beats hands-on experience. Look for a Home Inspection Training Institute that offers practical training opportunities. This might include:
- Field training sessions
- Virtual reality simulations
- Mock inspections
- Internship or mentorship programs
The more practice you can get before starting your career, the better prepared you’ll be.
Experienced Instructors
The quality of your education depends greatly on the expertise of your instructors. Look for institutes that employ instructors with extensive experience in the field. Ideally, they should have a background in home inspection, construction, or related fields.
Flexible Learning Options
In today’s digital age, many institutes offer a variety of learning options to suit different needs and schedules. These might include:
- In-person classes
- Online courses
- Hybrid programs
- Self-paced learning options
Choose a program that fits your learning style and schedule.
Top Home Inspection Training Institutes to Consider
Now that you know what to look for, let’s explore some of the top training institutes in the field. Remember, this list is not exhaustive, and it’s always a good idea to do your own research based on your specific needs and location.
Institute A
This institute offers a comprehensive program that covers all aspects of home inspection. They’re known for their experienced instructors and hands-on training opportunities.
Institute B
With a focus on technology in home inspection, this institute offers cutting-edge training using virtual reality simulations and drone technology.
Institute C
This institute is renowned for its flexible learning options, allowing students to choose between in-person, online, and hybrid programs.
Institute D
Known for its strong emphasis on business skills alongside technical knowledge, this institute is a great choice for those looking to start their own inspection business.
The Importance of Continuing Education
Once you’ve completed your initial training, it’s important to remember that learning doesn’t stop there. The field of home inspection is constantly evolving, with new technologies, building practices, and regulations emerging all the time.
Many states require home inspectors to complete continuing education courses to maintain their licenses. Even if it’s not required in your area, staying up-to-date with the latest developments in the field can give you a competitive edge.
Look for a Home Inspection Training Institute that offers continuing education courses or resources for graduates. This can be a valuable resource throughout your career.
Beyond Training: Building Your Career
While choosing the right training institute is crucial, it’s just the first step in building a successful career as a home inspector. Here are a few additional tips to help you get started:
Get Licensed and Certified
Requirements vary by state, but most require home inspectors to be licensed. After completing your training, make sure you understand and fulfill all the licensing requirements in your area.
In addition to licensing, consider pursuing certifications from professional organizations like ASHI or InterNACHI. These can enhance your credibility and may help you attract more clients.
Gain Experience
Nothing beats real-world experience. Consider working with an established inspection company or finding a mentor in the field before striking out on your own. This can help you build confidence and refine your skills.
Network and Market Yourself
Building relationships with real estate agents, mortgage brokers, and other professionals in the housing industry can be a great way to get referrals. Don’t be shy about marketing your services through social media, local business directories, and word-of-mouth recommendations.
Invest in Quality Tools
As a home inspector, your tools are your livelihood. Invest in high-quality inspection tools and keep them well-maintained. This might include items like:
- Moisture meters
- Electrical testers
- Infrared cameras
- Ladder
- Flashlight
- Protective gear (gloves, safety glasses, etc.)
Develop Soft Skills
While technical knowledge is crucial, don’t underestimate the importance of soft skills in this career. You’ll need to:
- Communicate effectively with clients
- Write clear, concise reports
- Manage your time efficiently
- Handle potentially stressful situations with professionalism
Many of these skills can be developed through practice and experience, but keep them in mind as you start your career.
The Future of Home Inspection
As we wrap up our chat about Home Inspection Training Institutes, let’s take a quick look at the future of this field. Like many industries, home inspection is being transformed by technology. Some trends to watch include:
Drone Technology
Drones are becoming increasingly popular for roof inspections, allowing inspectors to get a close look at hard-to-reach areas without risking their safety.
Thermal Imaging
Infrared cameras can help inspectors detect issues that aren’t visible to the naked eye, such as moisture intrusion or energy inefficiencies.
Smart Home Technology
As more homes incorporate smart technology, inspectors will need to stay up-to-date on these systems and how to evaluate them.
Virtual and Augmented Reality
Some training programs are already using VR and AR to provide realistic training simulations. These technologies may also play a role in how inspections are conducted or reported in the future.
Wrapping It Up
Choosing the right Home Inspection Training Institute is a crucial first step in launching your career as a home inspector. Look for a program that offers comprehensive training, hands-on experience, and is recognized by industry professionals.
Remember, your education doesn’t stop when you complete your initial training. Stay curious, keep learning, and stay up-to-date with industry developments. With the right foundation and a commitment to ongoing professional development, you can build a rewarding and successful career in home inspection.
So, are you ready to take the plunge? The world of home inspection is waiting for passionate, detail-oriented professionals like you. Good luck on your journey, and happy inspecting!
Also, read this: Your Complete Guide to New Home Construction Phase Inspections
It was just another weeknight in Manhattan when Melissa realized her oven wasn’t heating properly. With her kids hungry and a half-cooked casserole waiting, she scrambled to find an appliance repair service near me. After a quick online search, she came across Oven, Range & Stove Repair Pro and called 646-980-6968. Within hours, a technician arrived and saved dinner along with her evening.
Like Melissa, many homeowners don’t realize how much time and money they can save by working with the best professional appliance repair service in their area. Let’s explore how Oven, Range & Stove Repair Pro can help you get your kitchen back in shape without the stress or high cost.
Early Repairs Prevent Expensive Replacements
A small issue in your stove, oven, or range can turn into a major breakdown if ignored. A burner that won’t light or an oven that heats unevenly might seem manageable, but over time, these small problems can damage the appliance’s core components.
By hiring a professional appliance repair company like Oven, Range & Stove Repair Pro, you can catch problems early and avoid the cost of a full replacement. Their team of expert appliance repair technicians knows how to detect minor faults before they become serious.
This proactive approach is what makes them one of the best appliance repair service providers in Manhattan.
Fast Service That Keeps Your Routine On Track
Busy schedules don’t allow for long delays, especially when essential appliances stop working. That’s why speedy appliance technicians are essential in today’s world.
With speedy appliance technicians near me dispatched the same day you call, Oven, Range & Stove Repair Pro minimizes downtime. Whether you’re dealing with a broken range or a faulty stovetop, their team works fast without sacrificing quality.
Looking for a local appliance repair team that responds quickly? Call 646-980-6968 and get your repair done right the first time.
Professional Technicians Deliver Long-Term Value
DIY videos and budget repairmen may seem like money-saving options, but poor workmanship often leads to more damage. That’s why investing in professional appliance technicians near me is actually more affordable in the long run.
Oven, Range & Stove Repair Pro provides trained and licensed professional appliance technicians who understand all brands and models. They arrive fully equipped and ready to fix problems the right way.
This dedication to quality makes them a standout appliance repair company among others in Manhattan.
Affordable Appliance Repair That Fits Your Budget
Cost is one of the biggest concerns for homeowners facing appliance issues. Luckily, Oven, Range & Stove Repair Pro is known as an affordable appliance repair company offering top-tier service without breaking the bank.
Their pricing is upfront and fair. As an affordable appliance repair service, they provide accurate estimates, avoid unnecessary upsells, and ensure every dollar is well spent.
So if you’re looking for the best local appliance repair without inflated prices, this is the team to trust.
Specialized Experts for Ovens, Ranges, and Stoves
Not all technicians are qualified to fix cooking appliances. You need a stove repair professional who understands safety, gas lines, electronics, and heating mechanisms.
Oven, Range & Stove Repair Pro employs the best oven repair professionals, range repair professionals, and stove repair professionals near me to ensure that no matter the issue, you get specialized help.
From poor heating and broken knobs to full ignition failure, their affordable range repair professionals are trained to handle it all. If your appliance is misbehaving, don’t wait, call 646-980-6968 for expert assistance.
Local Knowledge Matters in Manhattan
Finding a repair team that knows the area is more valuable than most homeowners realize. When you hire Oven, Range & Stove Repair Pro, you’re choosing a business that understands the common appliance brands, building codes, and customer expectations in Manhattan.
As a local appliance repair expert, they bring a personal touch, fast access, and proven results. They’re not just another business, they’re your neighbors, and they treat your appliances with the same care as their own.
Long-Term Peace of Mind with the Right Partner
Working with the wrong repair company can lead to repeat visits, incomplete fixes, or voided warranties. With Oven, Range & Stove Repair Pro, you’re partnering with a team that guarantees their work and takes responsibility for delivering lasting results.
Their reputation as the best expert appliance repair team in Manhattan is backed by five-star reviews, return customers, and a track record of excellence. They’re not only a service provider, they’re a solution.
Conclusion: Save More with the Right Repair Service
When your kitchen appliances start acting up, it’s tempting to put off repairs or look for the cheapest option. But when you choose Oven, Range & Stove Repair Pro, you’re investing in speed, quality, and long-term savings.
Their commitment to timely service, expert repairs, and affordable pricing makes them the best appliance repair service in Manhattan. Whether it’s a minor glitch or a major issue, don’t wait until it’s too late.

Your beautiful rugs add warmth and personality to your home, but they also face unique challenges in Singapore’s tropical climate. Many homeowners make costly mistakes when caring for their rugs, often causing more damage than the original problem they were trying to solve. Understanding these common errors helps you protect your investment and maintain your rugs’ beauty for years to come.
Why Rug Care Matters More in Singapore
Singapore’s consistently high humidity levels create the perfect environment for mould, mildew, and dust mites to thrive in your rugs. With humidity averaging over 80% year-round, your rugs absorb moisture from the air constantly, making them vulnerable to problems that don’t affect rugs in drier climates. Professional rug cleaning in Singapore becomes essential when you consider how quickly these issues can develop in our tropical environment.
1. Over-Wetting Your Rugs During Cleaning
Water seems harmless enough, but using too much water when cleaning your rugs creates serious problems. Excessive moisture seeps deep into the rug fibres and padding, where it can remain trapped for days or even weeks. This trapped moisture becomes a breeding ground for mould and mildew, which can permanently damage your rug and create health hazards for your family. When cleaning spills, use a well-wrung cloth that doesn’t drip water onto your rug.
2. Scrubbing Stains Too Aggressively
When you discover a stain on your expensive rug, your first instinct might be to scrub it vigorously until it disappears. This approach actually drives the stain deeper into the fibres while damaging the delicate rug structure. Hard scrubbing can cause your rug to look worn and frayed, especially around the areas where you’ve been working on stains. Instead, blot stains gently with a clean cloth and appropriate cleaning solution.
3. Using the Wrong Cleaning Products
Different rug materials require specific cleaning approaches, and using the wrong products can cause permanent discolouration or damage. Wool rugs need different care than synthetic materials, and natural fibre rugs react differently to cleaning chemicals than machine-made options. Research cleaning products carefully before applying them to your rug, and always test any new product on a small, hidden area first.
4. Leaving Spills Untreated for Too Long
Singapore’s humid climate means that spills and stains set much faster than they would in drier environments. What might seem minor today can become a permanent stain within 24 hours when combined with our tropical humidity. Food spills, pet accidents, and drink spillages need immediate attention to prevent them from penetrating deep into your rug fibres, where they become nearly impossible to remove completely.
5. Over-Shampooing During Deep Cleaning
Using too much shampoo or failing to rinse thoroughly after cleaning creates residue buildup that attracts more dirt over time. This residue makes your rug look dull and can cause the fibres to break down prematurely. In Singapore’s humid climate, soap residue also provides additional moisture that encourages mould growth and creates musty odours that circulate throughout your home.
6. Relying Only on DIY Cleaning Methods
While regular vacuuming and spot cleaning help maintain your rugs, they cannot address the deep-seated dirt, allergens, and moisture that accumulate in Singapore’s climate. Professional cleaning reaches areas that home cleaning cannot access, removing dust mites, bacteria, and allergens that affect your family’s health. Most homeowners wait until their rugs look visibly dirty, but by then, significant damage may have already occurred.
Professional Solutions for Singapore’s Climate Challenges
When these mistakes feel overwhelming or when your rugs need deeper care than home methods can provide, professional services offer systematic solutions designed for Singapore’s specific challenges. Be Mitey Clean understands the unique requirements of rug cleaning in Singapore and uses specialised equipment that addresses both surface stains and deep-seated moisture issues that develop in our humid climate.
Their multi-step process includes pre-inspection to identify specific cleaning needs, dust mite removal systems that target allergens, and controlled moisture extraction that prevents over-wetting problems. The company’s experience with Singapore’s tropical conditions means they understand how to clean rugs thoroughly while ensuring proper drying to prevent mould and mildew development.
Protecting Your Investment
Your rugs represent significant investments in your home’s comfort and style, and protecting them from these common mistakes ensures they continue serving your family for years to come. Regular professional rug cleaning service in Singapore, combined with proper home maintenance, addresses the unique challenges our climate presents while preserving your rugs’ beauty and extending their lifespan.
Understanding these mistakes helps you make informed decisions about rug care and recognise when professional intervention can save you from costly replacement expenses. Your rugs deserve protection from Singapore’s challenging climate, and avoiding these common errors is the first step toward maintaining their value and appearance.
Home decoration plays a vital role in creating a comfortable and inviting living space. It reflects personal style, enhances a room’s visual appeal, and positively impacts mood and well-being. Thoughtful décor can transform a house into a home, evoking feelings of warmth and security while expressing individual creativity. Effective home design strikes a balance between visual charm and emotional comfort.

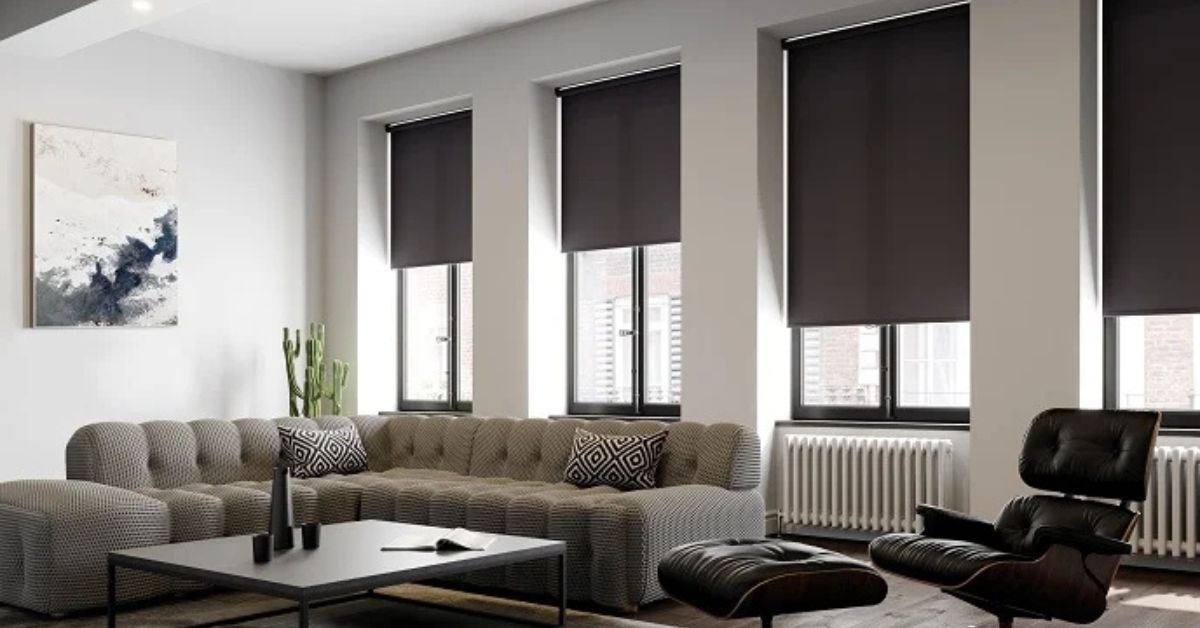
Why Choose Modern Blinds?
Modern blinds are window treatments designed to combine style and function in both homes and offices. Crafted from materials such as fabric, vinyl, and aluminum, they come in various types, including roller, vertical, and Venetian blinds. These options offer adjustable light control and privacy while complementing a wide range of interior designs. There are many modern blinds for every space which also includes automation features and energy-efficient properties, making them a smart choice for busy lifestyles that value convenience without compromising on style.
These blinds are versatile and available in a variety of colors, materials, and designs. They provide both aesthetic appeal and practical function by controlling light and ensuring privacy in any room. Whether it’s classic wood blinds or sleek roller shades, modern blinds can suit a wide range of interior styles. Their integration with smart home technology adds further convenience, making them an ideal choice for homeowners seeking a blend of elegance and practicality.
Modern Blinds for Kitchens
Modern blinds are especially practical for kitchens, offering both functionality and a touch of style. They ensure privacy while still letting in natural light, creating a bright and welcoming atmosphere. Their low-maintenance nature, many being washable or easy to wipe clean, makes them perfect for areas exposed to spills and splashes. Contemporary designs also elevate kitchen décor, seamlessly merging utility with style.
These blinds enhance both the efficiency of everyday kitchen tasks and the overall design of the space. Whether it’s sheer roller shades that allow light while preserving privacy or bamboo shades that bring warmth, modern blinds can match various kitchen themes. Adjustable slatted designs offer flexible light control, while bold colors or patterns can become standout features in minimalist settings.
Modern Blinds for Bedrooms
In bedrooms, modern blinds offer a combination of comfort, style, and function. They allow for precise control over lighting throughout the day and provide privacy without compromising air circulation. Often easier to clean than traditional curtains, they offer a low-maintenance way to enhance the look and feel of personal spaces.
Modern blinds also support personalization, fitting a wide range of bedroom aesthetics from minimalist to eclectic. Their visual and functional versatility helps set the mood, contributing to a more restful and relaxing atmosphere.
Modern Blinds Beyond Kitchens and Bedrooms
Modern blinds can elevate the look of any room, including living areas and workspaces. With countless options for design, color, and material, they offer both decorative appeal and useful features like light control and privacy. Some models include motorization for easier adjustments, allowing users to fine-tune lighting and ambiance with ease.
In living rooms, blinds enhance comfort and privacy while maintaining visual appeal. In bedrooms, blackout options can block unwanted light, supporting better sleep. Kitchen blinds resist moisture and are easy to clean, while blinds in office spaces can filter natural light to reduce glare on screens. The adaptability of modern blinds makes them a smart solution across different settings.

Choosing the Right Modern Blinds
When choosing modern blinds, several key factors come into play. Start by considering the room’s style and color scheme to ensure a cohesive design. Think about how much light and privacy you need opt for sheer materials for bright spaces or blackout styles for complete darkness. Also, consider how you’d like the blinds to operate manual or motorized systems are available to match your preferences. Accurate measurements are crucial for a seamless fit and optimal performance.
The color and material of the blinds also play a major role in setting the tone of a room. Warm tones add a sense of intimacy, while cooler shades evoke calmness. Materials like wood, metal, or fabric can bring different textures and character. Coordinating the color and material with the existing décor helps create a harmonious or intentionally contrasting look that suits your personal taste.
Maintenance and Care for Modern Blinds
Maintaining modern blinds is simple with the right approach. Regular dusting with a microfiber cloth keeps them looking clean and fresh, while a mild soap-and-water solution works for deeper cleaning. Avoid using harsh chemicals to prevent damage to the material. Check periodically for signs of wear, such as fraying cords or bent slats, to ensure your blinds stay functional and attractive.
Routine inspections and timely repairs help extend the life of your blinds. Addressing small issues early can prevent costly replacements and preserve both their appearance and performance. Taking a proactive approach to maintenance protects your investment and keeps your window treatments in top condition for years to come.
FAQs
What are the benefits of using modern blinds in home décor?
Modern blinds offer both style and functionality. They provide effective light control and privacy, match various interior designs, and often include features like automation and energy efficiency. Their ease of maintenance also makes them ideal for today’s fast-paced lifestyles.
How do I choose the right modern blinds for my space?
Consider the room’s design, color palette, and lighting needs. Blackout blinds are great for privacy and sleep, while sheer options allow natural light. Think about the preferred operating method manual or motorized and always take accurate measurements to ensure a proper fit.
How do I clean and maintain modern blinds?
Dust regularly with a microfiber cloth to prevent dirt buildup. For more thorough cleaning, use a mild soap solution and gently wipe the slats with a damp cloth. Avoid strong chemicals, and routinely check for signs of wear to keep the blinds functioning and looking their best.
-

 TECHNOLOGY1 year ago
Elevating Game Day Eats: A Guide to Crafting Crowd-Pleasing Sliders
-

 ENTERTAINMENT1 year ago
wave_of_happy_: Your Ultimate Guide
-

 FASHION1 year ago
GPMsign Fashion: Redefining Style with Purpose
-

 TECHNOLOGY11 months ago
Trader Joe’s Dayforce: Revolutionizing Workforce Management
-

 FOOD1 year ago
Altador Cup Food Court Background: A Culinary Extravaganza Unveiled
-

 SPORTS1 year ago
Score Chaser Sporting Clays: A Thrilling Pursuit of Precision
-

 HOME IMPROVEMENT9 months ago
What Kitchen Renovation Companies Offer Beyond Basic Remodeling
-

 NEWS1 year ago
Nyl2 Kemono: Unveiling the World