
HOME IMPROVEMENT
Your Complete Guide to New Home Construction Phase Inspections
Building a new home is an exciting adventure, but it can also be a complex process filled with potential pitfalls. One crucial aspect of ensuring your dream home becomes a reality is understanding and implementing new home construction phase inspections. These inspections serve as quality control checkpoints throughout the building process, helping to catch issues early and ensure your home is built to the highest standards.
In this comprehensive guide, we’ll walk you through each stage of the construction process and the associated inspections. Whether you’re a first-time homebuyer or a seasoned property investor, this information will empower you to make informed decisions and actively participate in the creation of your new home.
Why Are New Home Construction Phase Inspections Important?
Before we dive into the specifics, let’s take a moment to understand why these inspections are so crucial:
- Quality Assurance: Inspections help ensure that construction meets or exceeds local building codes and industry standards.
- Early Problem Detection: Identifying issues early in the construction process can save time, money, and headaches down the road.
- Peace of Mind: Regular inspections provide homeowners with confidence that their investment is being properly managed.
- Documentation: Inspection reports create a paper trail that can be valuable for future reference or in case of disputes.
- Education: The inspection process can help you learn more about your home’s systems and construction methods.
Now that we understand the importance, let’s explore each phase of construction and its associated inspections.
Phase 1: Pre-Construction and Site Preparation
Site Inspection
Before breaking ground, a thorough site inspection should be conducted. This inspection evaluates:
- Soil conditions
- Drainage patterns
- Topography
- Potential environmental issues
Permit Verification
Ensure all necessary permits have been obtained, including:
- Building permits
- Zoning approvals
- Environmental clearances
Phase 2: Foundation
The foundation is arguably the most critical component of your new home. New home construction phase inspections at this stage are vital.
Footing Inspection
Before concrete is poured, the inspector will check:
- Depth and width of footings
- Reinforcement placement
- Soil conditions
Foundation Wall Inspection
Once the foundation walls are formed but before backfilling, the inspector will verify:
- Wall thickness
- Reinforcement placement
- Waterproofing measures
- Drainage systems
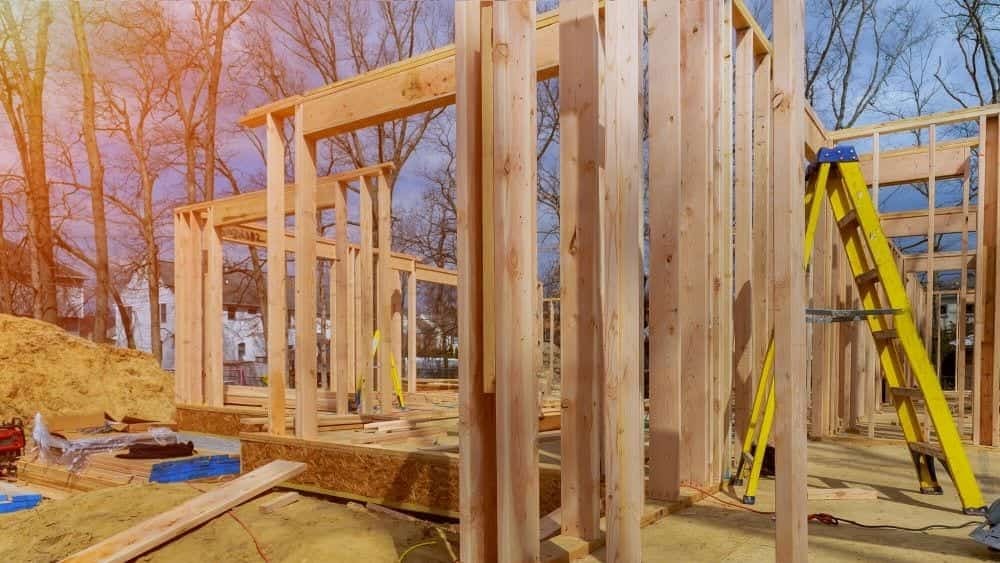
Phase 3: Framing
With the foundation in place, framing begins. This phase shapes the skeleton of your home.
Rough Framing Inspection
This inspection occurs before the installation of insulation and drywall. The inspector will check:
- Wall and roof framing
- Floor framing and subflooring
- Sheathing installation
- Window and door openings
- Load-bearing structures
Shear Wall and Lateral Bracing Inspection
In areas prone to high winds or seismic activity, additional inspections may focus on:
- Shear wall construction
- Lateral bracing systems
- Hold-down hardware installation
Phase 4: Rough-Ins
After framing, but before walls are closed up, various systems are installed.
Electrical Rough-In Inspection
The inspector will verify:
- Proper wire sizing and installation
- Placement of outlets, switches, and fixtures
- Grounding and bonding
- Panel box installation
Plumbing Rough-In Inspection
This inspection focuses on:
- Proper pipe sizing and materials
- Slope of drain lines
- Vent stack installation
- Water supply lines
- Pressure testing of all systems
HVAC Rough-In Inspection
The heating, ventilation, and air conditioning inspection will cover:
- Ductwork installation and sealing
- Equipment placement
- Ventilation systems
- Combustion air supply for fuel-burning appliances
Phase 5: Insulation and Air Sealing
Proper insulation and air sealing are crucial for energy efficiency and comfort.
Insulation Inspection
The inspector will check:
- R-value of insulation materials
- Proper installation techniques
- Coverage of all required areas
Air Sealing Inspection
This inspection focuses on:
- Sealing of penetrations in the building envelope
- Weather-stripping around doors and windows
- Proper sealing of ductwork
Phase 6: Drywall
Once rough-ins and insulation are complete, drywall installation begins.
Drywall Inspection
The inspector will verify:
- Proper fastening techniques
- Fire-rated assemblies where required
- Moisture-resistant materials in wet areas
Phase 7: Exterior Finishes
As interior work progresses, exterior finishes are applied.
Siding and Trim Inspection
This inspection covers:
- Proper installation of siding materials
- Flashing details around windows and doors
- Trim installation and sealing
Roofing Inspection
The roofing inspection will focus on:
- Proper installation of underlayment and roofing materials
- Flashing details around chimneys, vents, and valleys
- Ventilation systems in the attic or roof space
Phase 8: Interior Finishes
As the home nears completion, interior finishes are installed.
Flooring Inspection
The inspector will check:
- Proper installation of various flooring materials
- Subfloor preparation
- Moisture barriers where required
Cabinetry and Trim Inspection
This inspection verifies:
- Proper installation and attachment of cabinets
- Alignment and operation of doors and drawers
- Installation of baseboards, crown molding, and other trim elements
Phase 9: Final Inspections
As construction wraps up, a series of final inspections take place.
Electrical Final Inspection
The inspector will verify:
- All fixtures, outlets, and switches are properly installed and functioning
- GFCI and AFCI protection where required
- Labeling of circuit breakers
Plumbing Final Inspection
This inspection focuses on:
- Proper installation and function of all fixtures
- Water pressure testing
- Drainage system performance
HVAC Final Inspection
The inspector will check:
- Proper installation and function of all equipment
- Thermostat operation
- System efficiency and performance
Building Final Inspection
This comprehensive inspection covers:
- Compliance with all building codes
- Completion of all permitted work
- Safety features such as smoke detectors and carbon monoxide alarms
- Accessibility features, if applicable
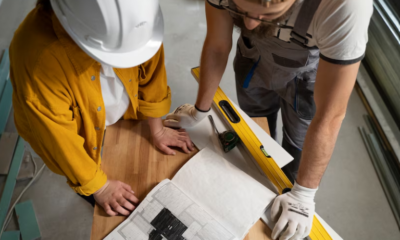
The Importance of Third-Party Inspections
While municipal inspections are crucial and legally required, many homeowners choose to supplement these with third-party inspections. These independent inspectors can provide an extra layer of scrutiny and often catch issues that might be overlooked in a routine municipal inspection.
New home construction phase inspections conducted by a third party can be especially valuable because:
- They work for you, not the builder or the municipality.
- They often have more time to conduct thorough inspections.
- They can provide detailed reports with photos and recommendations.
- They can help you understand the construction process and make informed decisions.
How to Prepare for New Home Construction Phase Inspections
To make the most of your new home construction phase inspections, consider the following tips:
- Educate Yourself: Learn about basic construction practices and building codes. This knowledge will help you ask informed questions and understand inspection results.
- Communicate with Your Builder: Maintain open lines of communication with your builder about the inspection schedule and any concerns you may have.
- Be Present: Whenever possible, attend inspections. This allows you to ask questions and gain firsthand knowledge about your home’s construction.
- Review Reports Promptly: Carefully read all inspection reports and discuss any issues or recommendations with your builder.
- Keep Records: Maintain a file of all inspection reports, communications with your builder, and any related documentation.
- Follow Up: Ensure that any identified issues are addressed and re-inspected if necessary.
- Ask Questions: Don’t hesitate to ask for clarification on anything you don’t understand in the inspection process or reports.
Common Issues Discovered During New Home Construction Phase Inspections
While every project is unique, some issues tend to crop up more frequently during inspections. Being aware of these can help you stay vigilant:
- Foundation Problems: Improper soil compaction, inadequate drainage, or poor concrete mix can lead to foundation issues.
- Framing Defects: Improperly sized lumber, inadequate support, or poor connections can compromise the home’s structure.
- Electrical Issues: Incorrect wiring, overloaded circuits, or improper grounding are common electrical problems.
- Plumbing Defects: Leaks, improper venting, or inadequate slope in drain lines are frequent plumbing issues.
- Roofing Problems: Improper flashing, inadequate underlayment, or poor shingle installation can lead to leaks.
- Insulation and Air Sealing Deficiencies: Gaps in insulation or poor air sealing can result in energy inefficiency and comfort issues.
- Moisture and Water Intrusion: Improper flashing, inadequate grading, or poor waterproofing can allow water to enter the home.
- HVAC Issues: Improperly sized equipment, poor ductwork design, or inadequate ventilation can affect comfort and efficiency.
- Code Violations: Failure to meet local building codes can result in safety hazards and legal issues.
Conclusion: Empowering Homeowners Through Knowledge
New home construction phase inspections are a critical part of the homebuilding process. They serve as your eyes and ears on the job site, ensuring that your new home is built to the highest standards of quality and safety. By understanding the inspection process and actively participating in it, you can help ensure that your dream home becomes a reality.
Remember, these inspections are not just about finding problems—they’re about creating solutions and ensuring the best possible outcome for your new home. Whether you’re building a cozy cottage or a sprawling estate, the principles of quality construction and thorough inspection remain the same.
As you embark on your homebuilding journey, arm yourself with knowledge, ask questions, and stay involved in the process. Your active participation, combined with the expertise of professionals conducting these inspections, will help create a home that you can be proud of for years to come.
Building a new home is a significant investment of time, money, and emotion. By embracing the inspection process and understanding its importance, you’re taking a proactive step towards protecting that investment and ensuring the safety and comfort of your family. Here’s to your new home—may it be built on a foundation of quality, integrity, and thorough inspection!
Also, read this: catherine comstock seidenicks home in carmel valley ca: Ultimate Guide
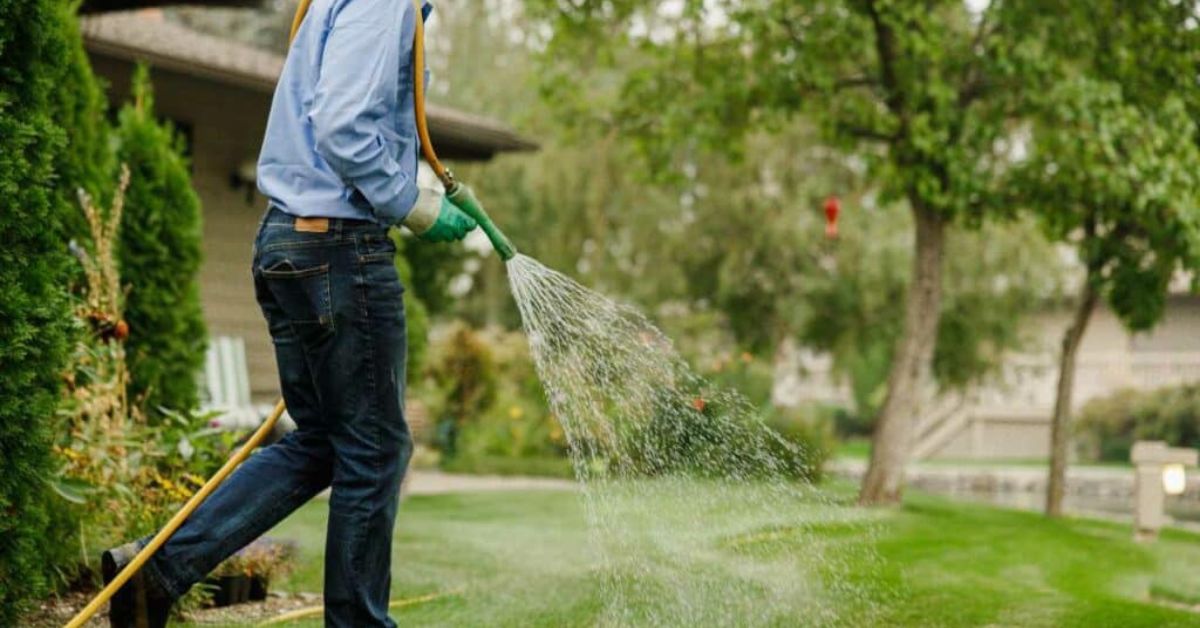
Homeowners are increasingly seeking ways to maintain lush, green yards while conserving water and lowering utility costs. Traditional watering methods often lead to waste through runoff, evaporation, or overwatering, especially during hot or dry seasons. Adopting smarter watering habits that align with changing environmental needs is essential to keeping outdoor spaces healthy and sustainable.
Modern systems make it easier to achieve efficiency without sacrificing appearance. Tools like smart timers, drip lines, and moisture sensors transform water delivery. Lawn irrigation systems that adapt to weather and soil conditions help minimize waste and ensure that grass and plants receive the right amount of hydration. These solutions support responsible water use and reduce long-term maintenance efforts, making them ideal for today’s resource-conscious homeowners.
Smart Irrigation Controllers
Smart irrigation controllers are revolutionizing lawn care and water conservation by automatically adjusting watering routines based on real-time weather data, historic patterns, and soil conditions. These controllers monitor rainfall, evaporation, temperature, and humidity to tailor watering to specific lawn needs. They can be managed remotely through smartphone apps, allowing homeowners to change settings based on climate conditions or personal preferences. Switching to smart irrigation can reduce water consumption by up to 30%.
Drip Irrigation Systems
Modern homeowners increasingly use advanced irrigation methods to maintain healthy, water-efficient lawns without excessive waste. Systems like drip irrigation target plant roots directly, reducing evaporation and runoff while ensuring consistent moisture levels. These techniques are especially effective in areas with water restrictions or hot, dry climates. Integrating such methods into landscaping plans can enhance function and appearance, supporting sustainable yard care. Smart controllers and moisture sensors can optimize water use, adjusting output based on weather or soil conditions. These innovations promote healthier lawns and gardens while conserving a critical resource, aligning with environmentally responsible home practices.
Rain Sensors
Rain sensors are essential components of modern water-saving irrigation systems. They automatically shut off watering during and after rain, preventing overwatering and protecting plants from excessive moisture that can suffocate roots and promote weeds. In areas with unpredictable rainfall, rain sensors are a practical upgrade that quickly pays for itself through reduced water bills and healthier lawns. For homeowners looking to enhance water efficiency, rain sensors are a valuable solution that extends irrigation equipment’s life by ensuring it’s only used when necessary.
Soil Moisture Sensors
Soil moisture sensors are essential for optimized irrigation. They monitor soil water content, activating your irrigation system only when necessary. Setting moisture thresholds prevents overwatering, which wastes water and can harm plant roots. Installing sensors at various depths ensures all plants receive proper hydration.
These sensors save water and promote healthier root systems, encouraging deeper growth and making plants more drought-resistant and less disease-prone. Integrating them into your irrigation strategy is a simple but effective way to enhance eco-friendly lawn care.
High-Efficiency Sprinkler Heads
Upgrading to high-efficiency sprinkler heads is a simple yet impactful way to enhance your irrigation system. These modern devices use precision nozzles and advanced spray patterns to distribute water evenly, reducing runoff and waste. Unlike conventional sprinklers, which can lose water to wind or evaporation, high-efficiency heads provide reliable coverage.
They are particularly beneficial for lawns with unique shapes or landscaping challenges, preventing patchy areas and flooding. Compatible with most existing systems, these heads offer a cost-effective solution to improve the health and appearance of your outdoor space while lowering water bills.

It was just another weeknight in Manhattan when Melissa realized her oven wasn’t heating properly. With her kids hungry and a half-cooked casserole waiting, she scrambled to find an appliance repair service near me. After a quick online search, she came across Oven, Range & Stove Repair Pro and called 646-980-6968. Within hours, a technician arrived and saved dinner along with her evening.
Like Melissa, many homeowners don’t realize how much time and money they can save by working with the best professional appliance repair service in their area. Let’s explore how Oven, Range & Stove Repair Pro can help you get your kitchen back in shape without the stress or high cost.
Early Repairs Prevent Expensive Replacements
A small issue in your stove, oven, or range can turn into a major breakdown if ignored. A burner that won’t light or an oven that heats unevenly might seem manageable, but over time, these small problems can damage the appliance’s core components.
By hiring a professional appliance repair company like Oven, Range & Stove Repair Pro, you can catch problems early and avoid the cost of a full replacement. Their team of expert appliance repair technicians knows how to detect minor faults before they become serious.
This proactive approach is what makes them one of the best appliance repair service providers in Manhattan.
Fast Service That Keeps Your Routine On Track
Busy schedules don’t allow for long delays, especially when essential appliances stop working. That’s why speedy appliance technicians are essential in today’s world.
With speedy appliance technicians near me dispatched the same day you call, Oven, Range & Stove Repair Pro minimizes downtime. Whether you’re dealing with a broken range or a faulty stovetop, their team works fast without sacrificing quality.
Looking for a local appliance repair team that responds quickly? Call 646-980-6968 and get your repair done right the first time.
Professional Technicians Deliver Long-Term Value
DIY videos and budget repairmen may seem like money-saving options, but poor workmanship often leads to more damage. That’s why investing in professional appliance technicians near me is actually more affordable in the long run.
Oven, Range & Stove Repair Pro provides trained and licensed professional appliance technicians who understand all brands and models. They arrive fully equipped and ready to fix problems the right way.
This dedication to quality makes them a standout appliance repair company among others in Manhattan.
Affordable Appliance Repair That Fits Your Budget
Cost is one of the biggest concerns for homeowners facing appliance issues. Luckily, Oven, Range & Stove Repair Pro is known as an affordable appliance repair company offering top-tier service without breaking the bank.
Their pricing is upfront and fair. As an affordable appliance repair service, they provide accurate estimates, avoid unnecessary upsells, and ensure every dollar is well spent.
So if you’re looking for the best local appliance repair without inflated prices, this is the team to trust.
Specialized Experts for Ovens, Ranges, and Stoves
Not all technicians are qualified to fix cooking appliances. You need a stove repair professional who understands safety, gas lines, electronics, and heating mechanisms.
Oven, Range & Stove Repair Pro employs the best oven repair professionals, range repair professionals, and stove repair professionals near me to ensure that no matter the issue, you get specialized help.
From poor heating and broken knobs to full ignition failure, their affordable range repair professionals are trained to handle it all. If your appliance is misbehaving, don’t wait, call 646-980-6968 for expert assistance.
Local Knowledge Matters in Manhattan
Finding a repair team that knows the area is more valuable than most homeowners realize. When you hire Oven, Range & Stove Repair Pro, you’re choosing a business that understands the common appliance brands, building codes, and customer expectations in Manhattan.
As a local appliance repair expert, they bring a personal touch, fast access, and proven results. They’re not just another business, they’re your neighbors, and they treat your appliances with the same care as their own.
Long-Term Peace of Mind with the Right Partner
Working with the wrong repair company can lead to repeat visits, incomplete fixes, or voided warranties. With Oven, Range & Stove Repair Pro, you’re partnering with a team that guarantees their work and takes responsibility for delivering lasting results.
Their reputation as the best expert appliance repair team in Manhattan is backed by five-star reviews, return customers, and a track record of excellence. They’re not only a service provider, they’re a solution.
Conclusion: Save More with the Right Repair Service
When your kitchen appliances start acting up, it’s tempting to put off repairs or look for the cheapest option. But when you choose Oven, Range & Stove Repair Pro, you’re investing in speed, quality, and long-term savings.
Their commitment to timely service, expert repairs, and affordable pricing makes them the best appliance repair service in Manhattan. Whether it’s a minor glitch or a major issue, don’t wait until it’s too late.

Your beautiful rugs add warmth and personality to your home, but they also face unique challenges in Singapore’s tropical climate. Many homeowners make costly mistakes when caring for their rugs, often causing more damage than the original problem they were trying to solve. Understanding these common errors helps you protect your investment and maintain your rugs’ beauty for years to come.
Why Rug Care Matters More in Singapore
Singapore’s consistently high humidity levels create the perfect environment for mould, mildew, and dust mites to thrive in your rugs. With humidity averaging over 80% year-round, your rugs absorb moisture from the air constantly, making them vulnerable to problems that don’t affect rugs in drier climates. Professional rug cleaning in Singapore becomes essential when you consider how quickly these issues can develop in our tropical environment.
1. Over-Wetting Your Rugs During Cleaning
Water seems harmless enough, but using too much water when cleaning your rugs creates serious problems. Excessive moisture seeps deep into the rug fibres and padding, where it can remain trapped for days or even weeks. This trapped moisture becomes a breeding ground for mould and mildew, which can permanently damage your rug and create health hazards for your family. When cleaning spills, use a well-wrung cloth that doesn’t drip water onto your rug.
2. Scrubbing Stains Too Aggressively
When you discover a stain on your expensive rug, your first instinct might be to scrub it vigorously until it disappears. This approach actually drives the stain deeper into the fibres while damaging the delicate rug structure. Hard scrubbing can cause your rug to look worn and frayed, especially around the areas where you’ve been working on stains. Instead, blot stains gently with a clean cloth and appropriate cleaning solution.
3. Using the Wrong Cleaning Products
Different rug materials require specific cleaning approaches, and using the wrong products can cause permanent discolouration or damage. Wool rugs need different care than synthetic materials, and natural fibre rugs react differently to cleaning chemicals than machine-made options. Research cleaning products carefully before applying them to your rug, and always test any new product on a small, hidden area first.
4. Leaving Spills Untreated for Too Long
Singapore’s humid climate means that spills and stains set much faster than they would in drier environments. What might seem minor today can become a permanent stain within 24 hours when combined with our tropical humidity. Food spills, pet accidents, and drink spillages need immediate attention to prevent them from penetrating deep into your rug fibres, where they become nearly impossible to remove completely.
5. Over-Shampooing During Deep Cleaning
Using too much shampoo or failing to rinse thoroughly after cleaning creates residue buildup that attracts more dirt over time. This residue makes your rug look dull and can cause the fibres to break down prematurely. In Singapore’s humid climate, soap residue also provides additional moisture that encourages mould growth and creates musty odours that circulate throughout your home.
6. Relying Only on DIY Cleaning Methods
While regular vacuuming and spot cleaning help maintain your rugs, they cannot address the deep-seated dirt, allergens, and moisture that accumulate in Singapore’s climate. Professional cleaning reaches areas that home cleaning cannot access, removing dust mites, bacteria, and allergens that affect your family’s health. Most homeowners wait until their rugs look visibly dirty, but by then, significant damage may have already occurred.
Professional Solutions for Singapore’s Climate Challenges
When these mistakes feel overwhelming or when your rugs need deeper care than home methods can provide, professional services offer systematic solutions designed for Singapore’s specific challenges. Be Mitey Clean understands the unique requirements of rug cleaning in Singapore and uses specialised equipment that addresses both surface stains and deep-seated moisture issues that develop in our humid climate.
Their multi-step process includes pre-inspection to identify specific cleaning needs, dust mite removal systems that target allergens, and controlled moisture extraction that prevents over-wetting problems. The company’s experience with Singapore’s tropical conditions means they understand how to clean rugs thoroughly while ensuring proper drying to prevent mould and mildew development.
Protecting Your Investment
Your rugs represent significant investments in your home’s comfort and style, and protecting them from these common mistakes ensures they continue serving your family for years to come. Regular professional rug cleaning service in Singapore, combined with proper home maintenance, addresses the unique challenges our climate presents while preserving your rugs’ beauty and extending their lifespan.
Understanding these mistakes helps you make informed decisions about rug care and recognise when professional intervention can save you from costly replacement expenses. Your rugs deserve protection from Singapore’s challenging climate, and avoiding these common errors is the first step toward maintaining their value and appearance.
-

 TECHNOLOGY2 years ago
Elevating Game Day Eats: A Guide to Crafting Crowd-Pleasing Sliders
-

 ENTERTAINMENT2 years ago
wave_of_happy_: Your Ultimate Guide
-

 FASHION2 years ago
GPMsign Fashion: Redefining Style with Purpose
-

 TECHNOLOGY2 years ago
Trader Joe’s Dayforce: Revolutionizing Workforce Management
-

 FOOD2 years ago
Altador Cup Food Court Background: A Culinary Extravaganza Unveiled
-
 HOME IMPROVEMENT1 year ago
What Kitchen Renovation Companies Offer Beyond Basic Remodeling
-

 SPORTS2 years ago
Score Chaser Sporting Clays: A Thrilling Pursuit of Precision
-

 NEWS2 years ago
Nyl2 Kemono: Unveiling the World